Windows 11 on Hyper-V
Windows 11 has much stricter system requirements compared to earlier versions of Windows which can cause issues with installing and running it in a virtualized environment. While it is possible to run Windows 11 in a virtual environment, it requires additional configuration to support it properly.
This guide details the steps that are required to configure and install Windows 11 on Hyper-V. The procedure for the actual installation of Windows 11 is beyond the scope of this guide but is straightforward and not overly complicated.
These instructions were created using Hyper-V on Windows Server 2022 Standard (21H2 Build 20348.1726) and Windows 11 Pro (22H2 Build 22621.1702).
Windows 11 System Requirements
These are the minimum system requirements for Windows 11:
- Processor Speed: 1 GHz
- Processor Cores: 2 Cores or CPUs
- Memory: 4 GB
- Storage: 64 GB
- System Firmware: UEFI and Secure Boot
- TPM: Trusted Platform Module 2.0
The most important system requirements for Windows 11 involve the TPM module and Secure Boot options. Fortunately, newer Hyper-V supports this functionality with the use of a Generation 2 VM. These options are not enabled by default and need to be configured to install and use Windows 11 on Hyper-V.
The CPU, Memory and Storage requirements are quite strict compared to earlier versions of Windows as well, and the installer will not allow you to proceed if these requirements are not met. Unlike Windows 10 which works on Hyper-V without any issues, Windows 11 will not work correctly if the exact system requirements are not met.
Windows Setup will fail and throw the following error if all conditions for installation are not met:
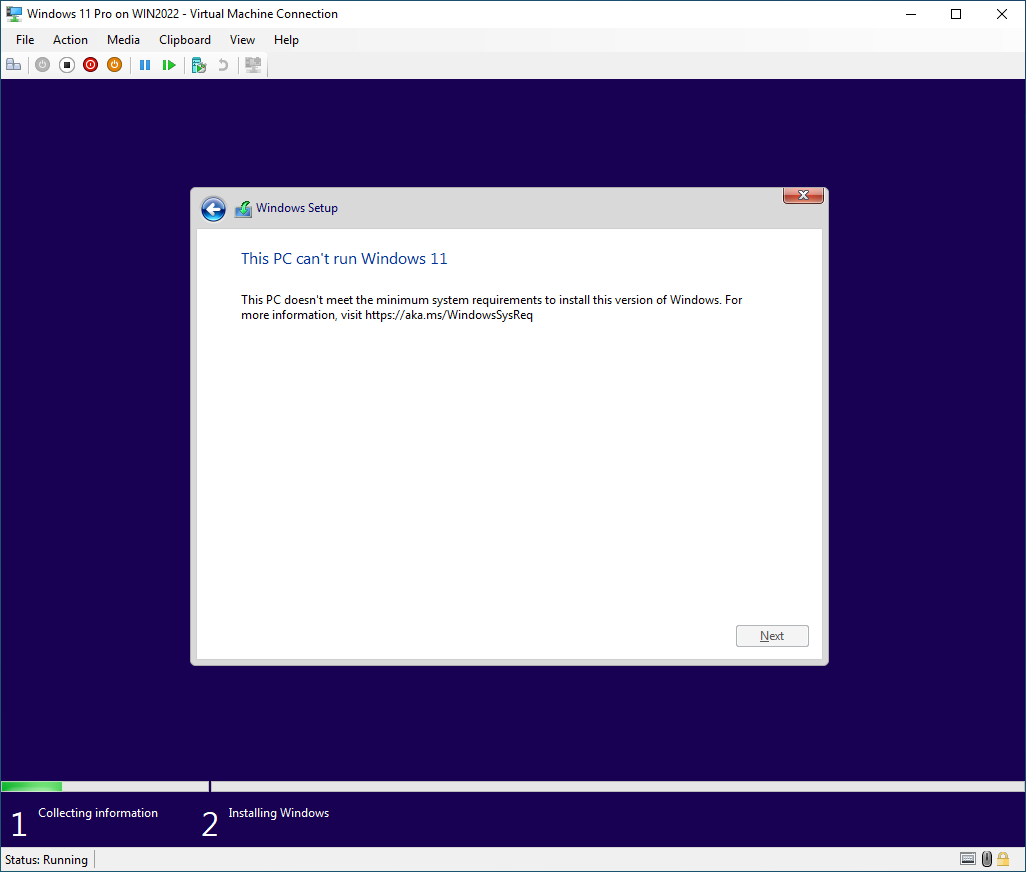
The “This PC can’t run Windows 11” error can be easily corrected by configuring the virtual machine with the necessary settings. The steps to bypass this error can be found below.
There are deployment options and registry tweaks that can be performed to install Windows 11 regardless of the system requirements, but those methods are not discussed in this guide.
Install and Configure Windows 11
Installing and configuring Windows 11 to run on Hyper-V requires only a few steps to complete. Windows 11 is strict on the memory and storage requirements, so ensure that you configure the correct specifications. Ensure that you correctly follow the steps for configuring the TPM module as well as adding the additional CPU.
Create the Windows 11 Virtual Machine
Creating a virtual machine using Hyper-V is straightforward, with only several settings that need to be specified at the time of the virtual machine creation. For Windows 11, the virtual machine Generation must be specified at the time when the virtual machine is created, as it is not easy to change later.
To create a virtual machine for Windows 11 using Hyper-V, perform the following steps:
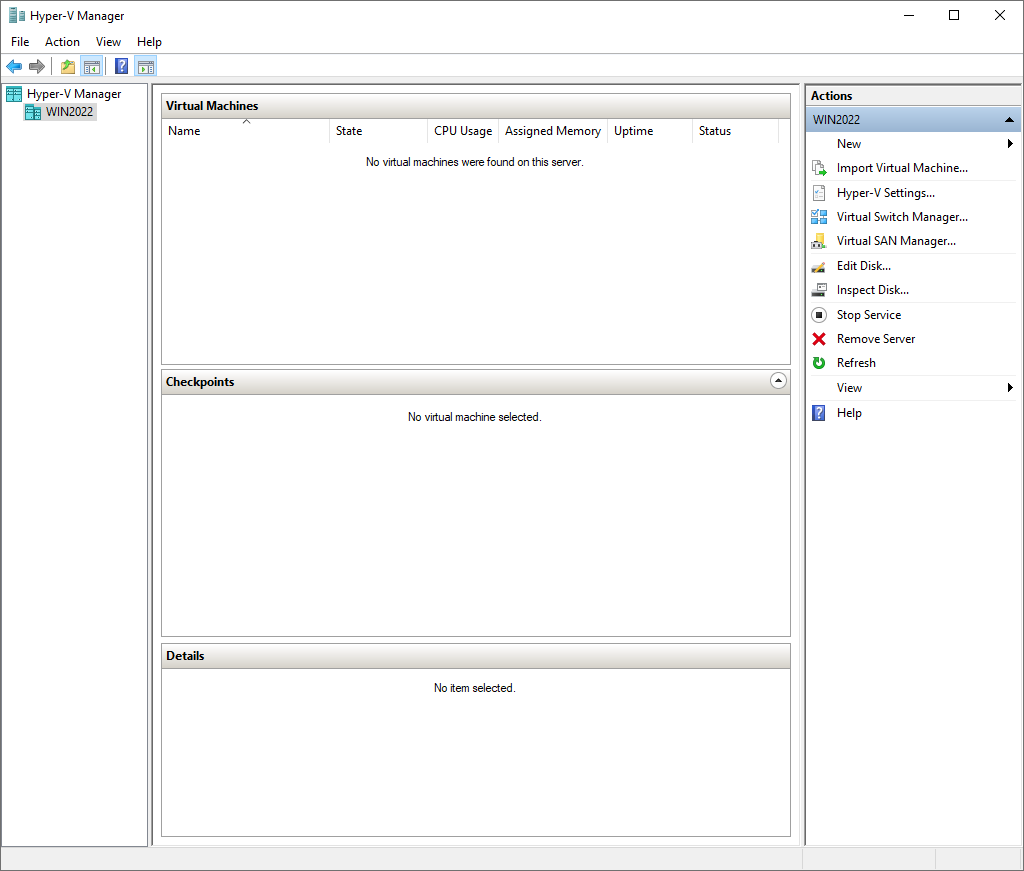
- Open the Hyper-V Manager console (virtmgmt.msc):
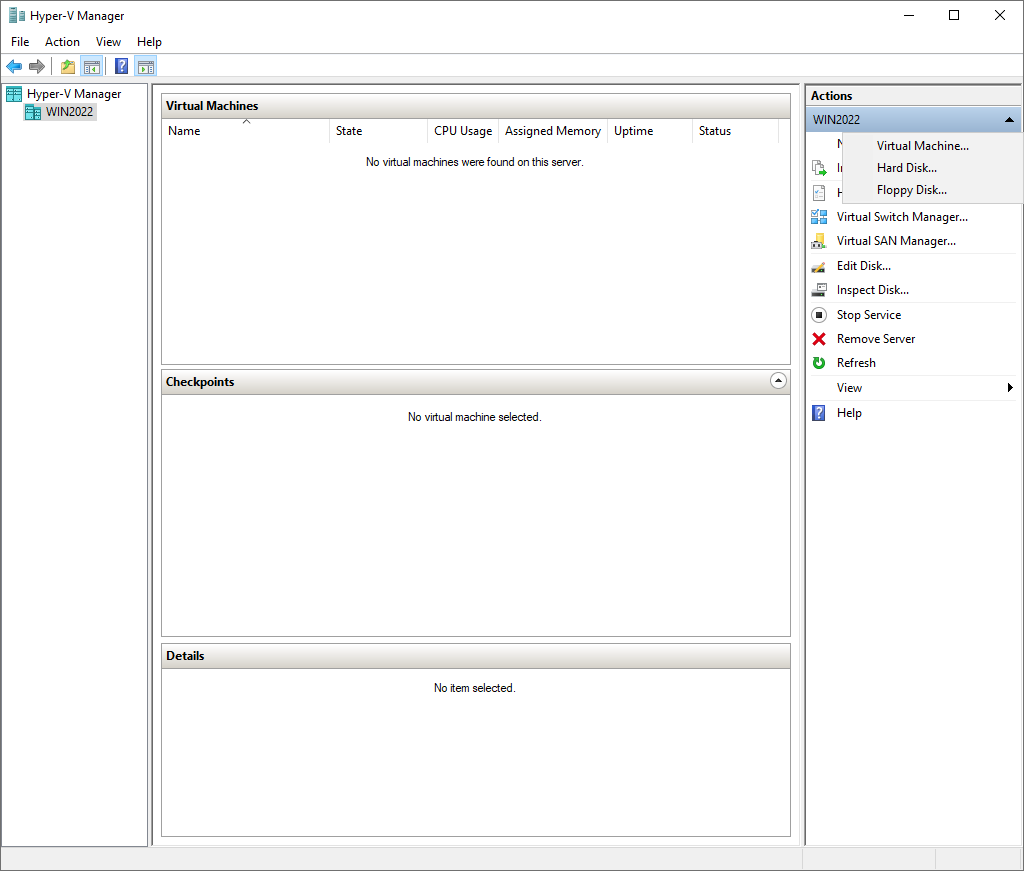
- In the Actions pane, click New and select Virtual Machine…:
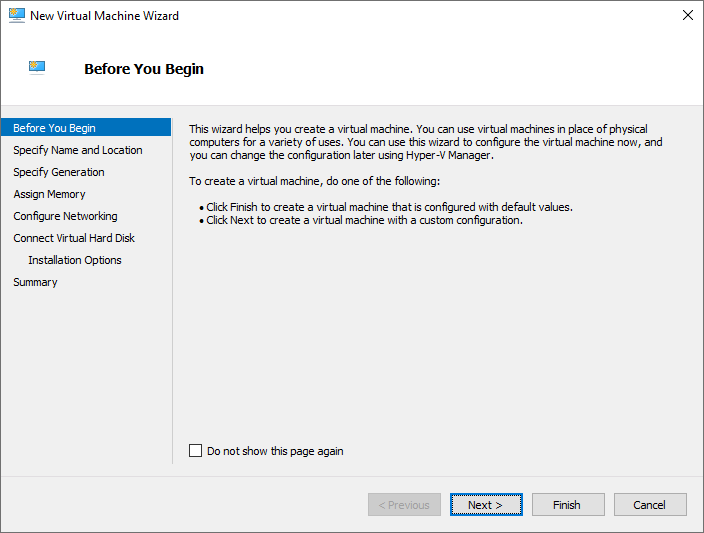
- The New Virtual Machine Wizard window will appear. On the Before You Begin screen, click the Next button to continue:
- On the Specify Name and Location screen, enter a name for the virtual machine in the Name field. Click the Next button to continue:

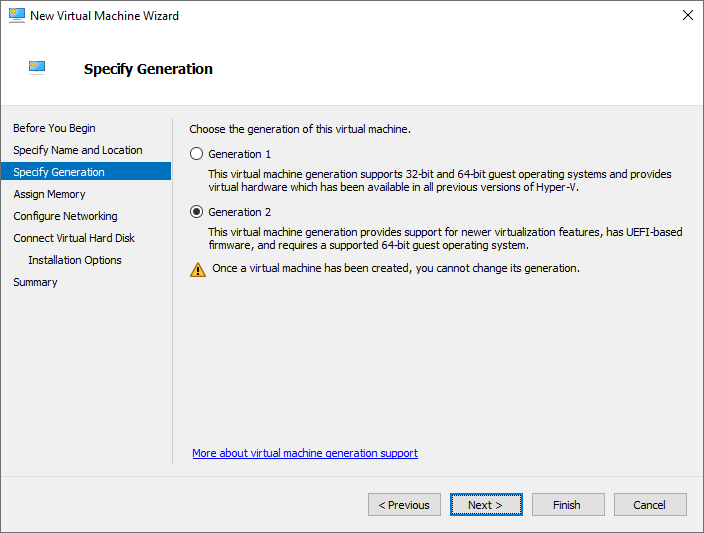
- On the Specify Generation screen, select the Generation 2 setting for the virtual machine. Click the Next button to continue:
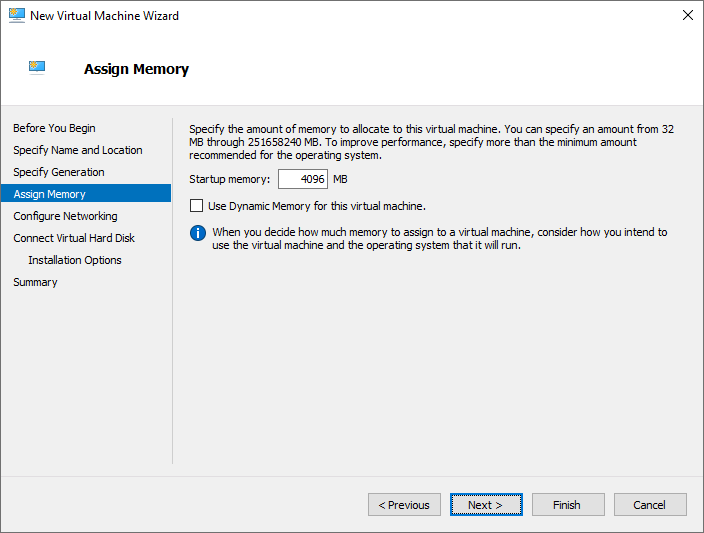
- On the Assign Memory screen, set the amount of Startup memory for the virtual machine to 4096 MB:
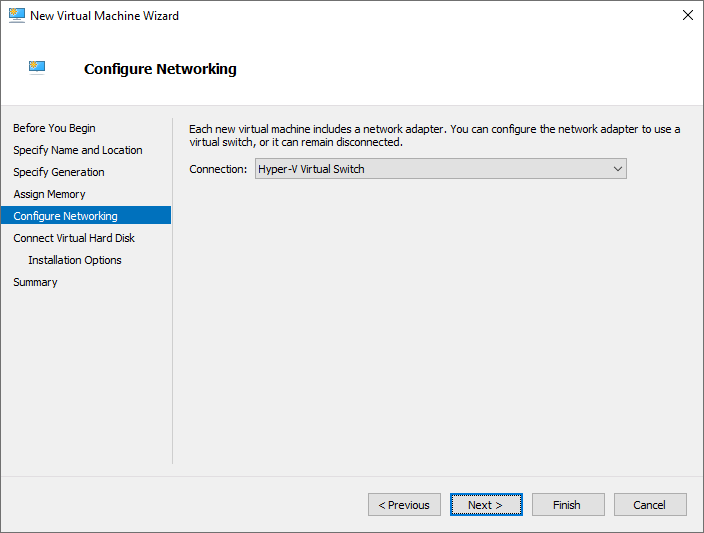
- On the Configure Networking screen, select the network to use in the Connection list and click Next to continue:
-
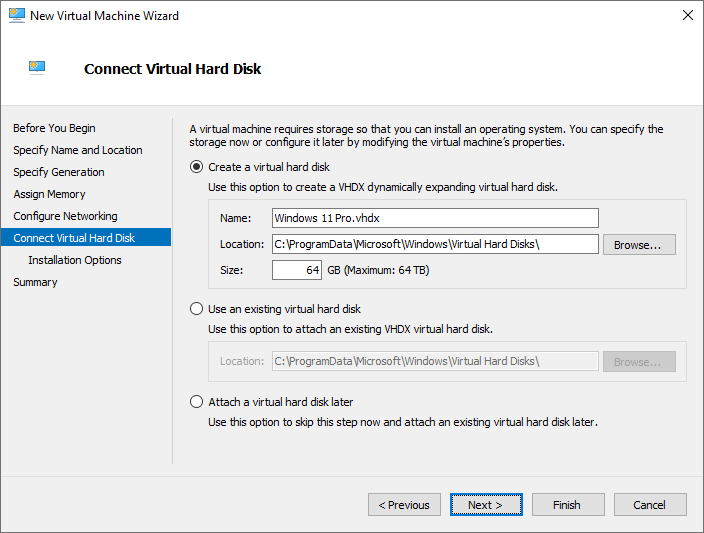
On the Configure Virtual Hard Disk screen, change the following options:
- Name - Enter the name for the virtual hard disk.
- Location - Enter the location of the virtual hard disk (usually the Hyper-V default location).
- Size - Enter the size of the virtual hard disk in GB. Windows 11 it requires 64 GB minimum.
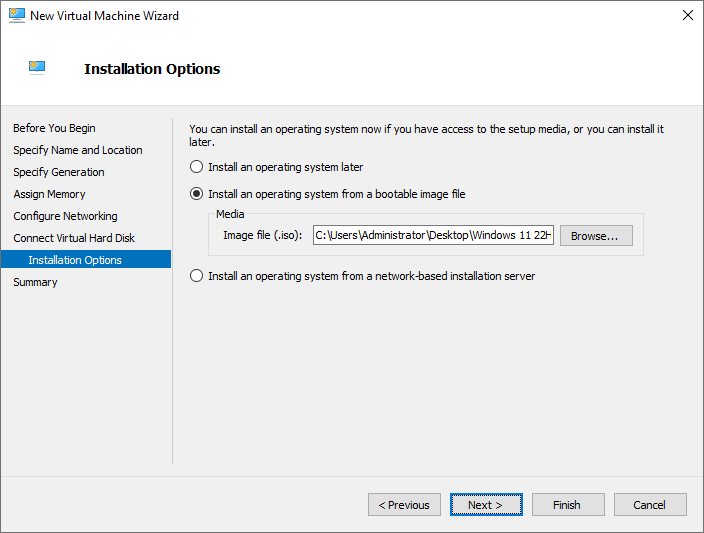
- On the Installation Options screen, specify where the Operating System installation source is located. Click the Next button to continue:
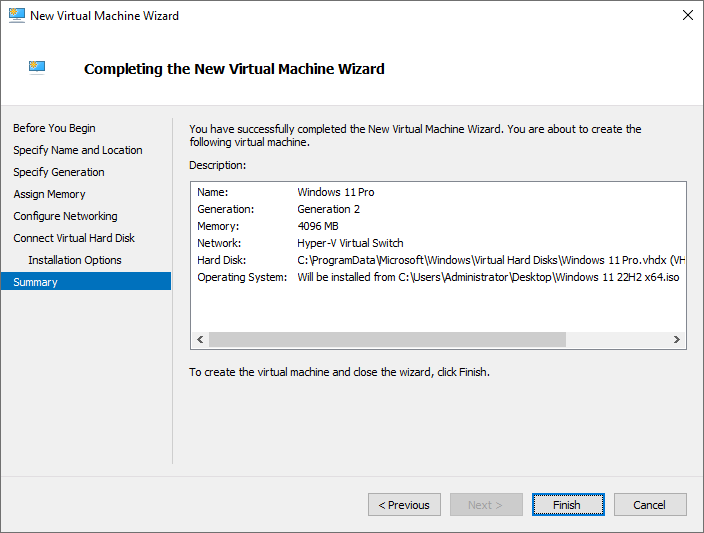
- On the Completing the New Virtual Machine Wizard screen, click the Finish button to continue:
Enable Security Settings and Additional Processors
Once the virtual machine has been created, the TPM needs to be added to the configuration and additional CPUs need to be added as well.
Ensure that the virtual machine is shut down and powered off prior to attempting these steps.
To configure the virtual machine TPM and CPU settings, perform the following steps:
- Open the Hyper-V Manager console (virtmgmt.msc):
- Right-click on the virtual machine that you want to modify and select Settings….
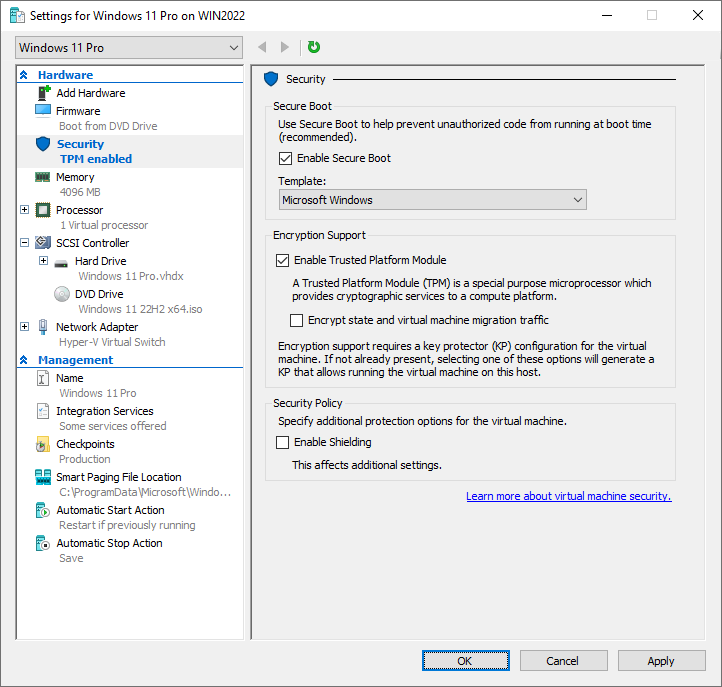
- On the left side of the window, select the Security option.
- Under Secure Boot, ensure that the option for Enable Secure Boot is selected.
- Under Encryption Support, select the option for Enable Trusted Platform Module:
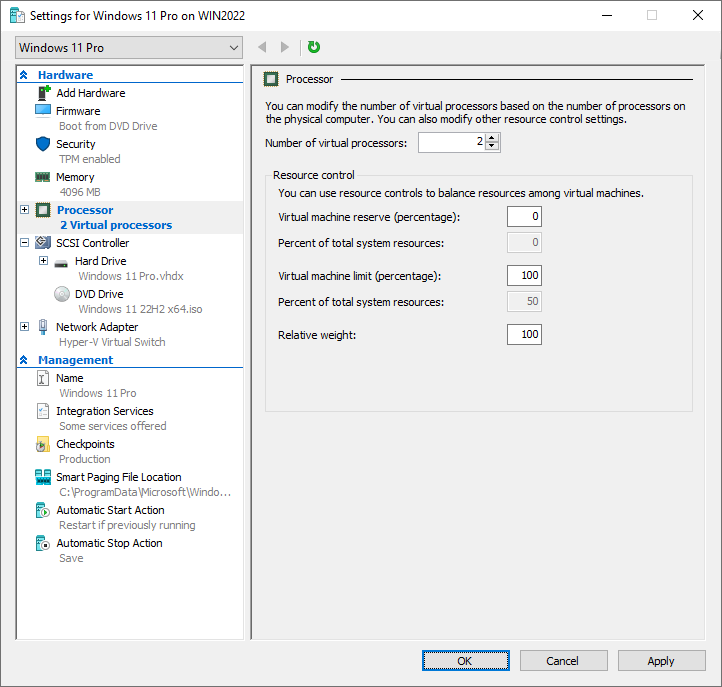
- On the left side of the window, select the Processor option.
- For the Number of virtual processors, increase the number to at least 2:
- Click the Apply button and then click the OK button.
This should complete the additional configuration steps required to allow for the installation of Windows 11 on Hyper-V.
Install Windows 11
Once the virtual machine settings have been successfully configured, it is now possible to install Windows 11 as you normally would: